- Register
- Log in
- Wishlist (0)
- Cart (0) You have no items in your shopping cart.
Quotes Available

Converting to 134a - GM Cars
R-12 "Freon"
Until 1995, most cars with air conditioning used R-12 Freon refrigerant which has shown to have an environmental impact. R-12 is no longer used or produced in many countries and remaining quantities have skyrocketed in price. Since then, the industry standard has been R134a, which is an efficient replacement. Contrary to popular belief, most cars originally equipped with R-12 can be converted to 134a and still keep you just as cool.
Understanding the basic type of a/c systems GM used on their classics will help with you determine the best route for your project.
Bypass systems
This is a generic term for the earlier valve regulated systems for the early GM vehicles. In these systems, when the air condition was turned on, the clutch on the compressor was engaged until the air was turned off. When the system reached certain pressures and/or temperatures a valve opened and allows the refrigerant to continue to circulate. This is much different than newer systems where the compressor clutch engages off and on to regulate refrigerant. This is where the old adage of turning off the air to save gas came from. Because no matter what the compressor was working all the time when turned on.
Cycling systems
This is also a generic term for later and modern systems where the clutch on the compressor engages off and on to regulate refrigerant. In these systems, when the air conditioner is turned on, the compressor clutch is engaged until certain pressures and/or temperatures are reached in the system. Once this criterion is met a pressure switch or thermostat opens the clutch power circuit and disengages the clutch, stopping the circulation of refrigerant.
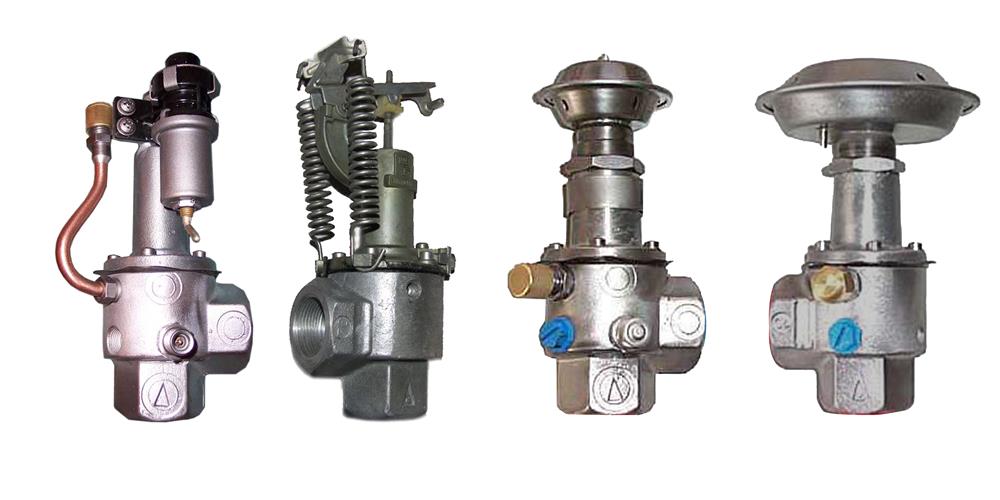
1955-61 Models with Hot Gas Valve (By Pass or Hot Gas By-Pass Valve)
The Hot Gas Valve is most often found mounted to the compressor, though some cars have it mounted back near the evaporator. These are mounted to the suction side of the system, so they it is a valve that regulated pressure through suction.
This is a split image of a before and after restoration of a hot gas valve:
.jpg) (Click here for more information about Hot Gas Valve Restoration)
(Click here for more information about Hot Gas Valve Restoration)
Minimum Requirements for converting a car with a Hot Gas Valve to R134a
- Change or restore the filter-drier.
- Drain the compressor oil and recharge with 134a compatible (PAG or Ester Oil) oil. This is assuming the compressor is currently functioning correctly.
- Ensure that the system is clean and free of contaminants (Depending on component condition, this may be a simple matter of blowing out with compressed air or liquid flushing with an air-conditioning flushing agent)
- Replace or restore all rubber hoses with barrier hose.
- Rebuild hot gas valve.
- Install 134a charge port adapters.
- Charge with 134a between 70-80% of the original R12 charge amount. Note: Hot gas valve will need to be adjusted during the charging process to properly adjust the low side by-pass pressure to 20psi.
- Replace any O-rings with 134a compatible.
Recommended:
- Install hi/lo pressure switch
HELPFUL HINTS
- Ignore the sight-glass. A properly charged 134a system will likely show bubbles in the sight-glass.
- Typical 134a charge rate will be approximately 70-80% of the factory R12 charge amount.
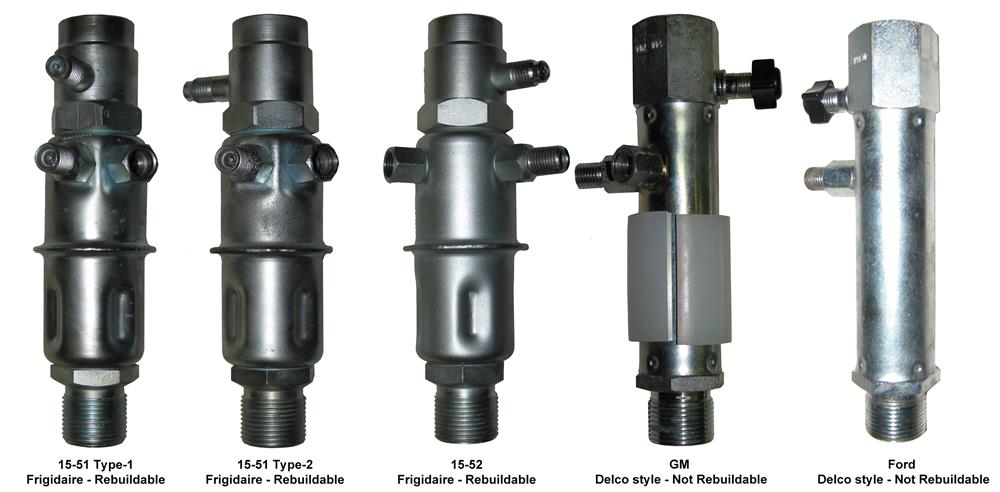
1962-66 Models with Suction Throttling Valve (STV)
The suction throttling valve is installed on the evaporator, near the firewall. Here are some examples:
(Click here for more information about STV Restoration)
Minimum Requirements
- Change or restore the filter-drier.
- Drain the compressor oil and recharge with 134a compatible (PAG or Ester Oil) oil. This is assuming the compressor is currently functioning correctly.
- Ensure that the system is clean and free of contaminants (Depending on component condition, this may be a simple matter of blowing out with compressed air or liquid flushing with an air-conditioning flushing agent)
- Replace or restore all rubber hoses with barrier hose.
- Rebuild suction throttling valve.
- Install 134a charge port adapters.
- Charge with 134a between 70-80% of the original R12 charge amount. Note: Suction throttling valve will need to be adjusted during the charging process to properly adjust the low side by-pass pressure to 20psi.
- Replace any O-rings with 134a compatible.
Recommended:
- Install hi/lo pressure switch
HELPFUL HINTS
- Ignore the sight-glass. A properly charged 134a system will likely show bubbles in the sight-glass.
- Typical 134a charge rate will be approximately 70-80% of the factory R12 charge amount.
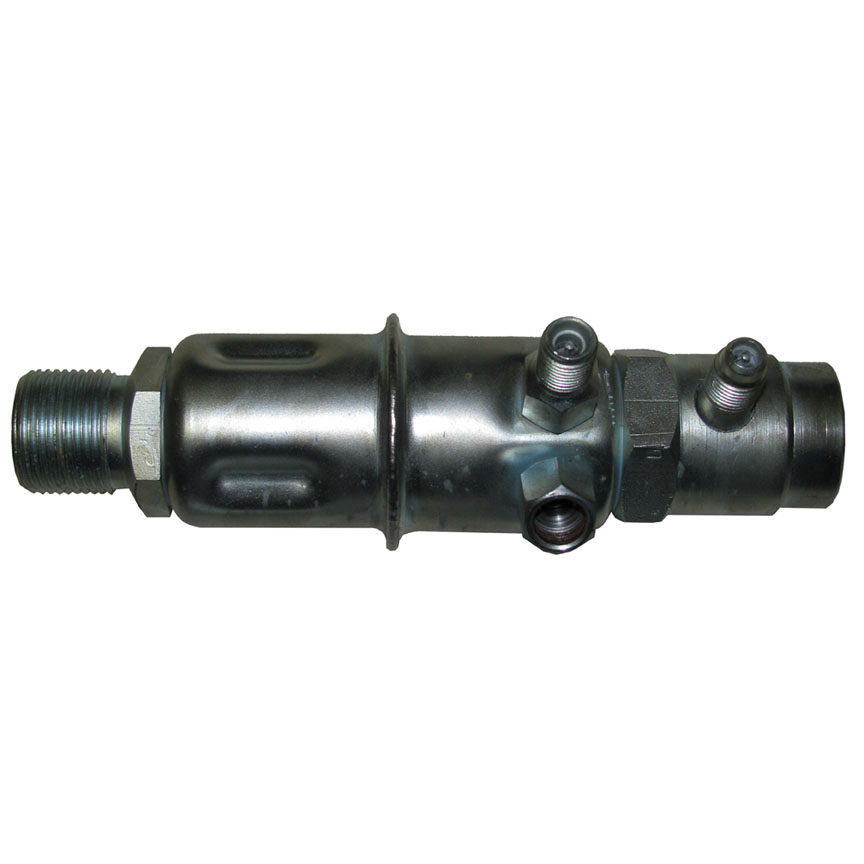
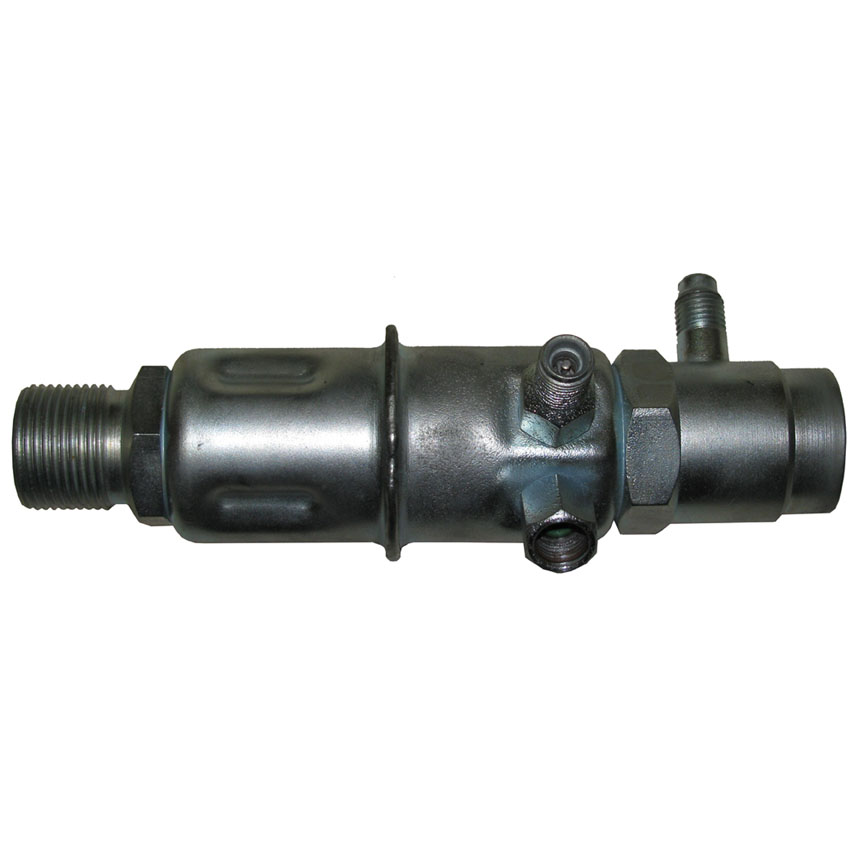
1966-73 Models with POA Valve
The POA Valve is installed on the evaporator, near the firewall. Here are examples of valves GM used:
(Click here for more information about POA Restoration)
Minimum Requirements
- Change or restore the filter-drier.
- Drain the compressor oil and recharge with 134a compatible (PAG or Ester Oil) oil. This is assuming the compressor is currently functioning correctly.
- Ensure that the system is clean and free of contaminants (Depending on component condition, this may be a simple matter of blowing out with compressed air or liquid flushing with an air-conditioning flushing agent)
- Replace or restore all rubber hoses with barrier hose.
- Install 134a charge port adapters.
- Have POA Valve Rebuild & Recalibrated.
- Charge with 134a between 70-80% of the original R12 charge amount.
- Replace any O-rings with 134a compatible.
Recommended:
- Install hi/lo pressure switch
HELPFUL HINTS
- Ignore the sight-glass. A properly charged 134a system will likely show bubbles in the sight-glass.
- Typical 134a charge rate will be approximately 70-80% of the factory R12 charge amount.
POA Options from Original Air
Rebuilt & NOS POA Valves.
We offer POA valves that are built from our core bank. These are tuned to either 134a or R12. These can be purchased direct from our website if you do not want to have your exact original rebuilt. There is a core charge for this purchase, and there may be an extended lead time for these orders. We are also always looking to buy cores outright if you happen to have some around the shop! If you are looking for a original NOS valve, we have some posted on the website, but may have some in our shop. Contact us if you are looking for an NOS valve.
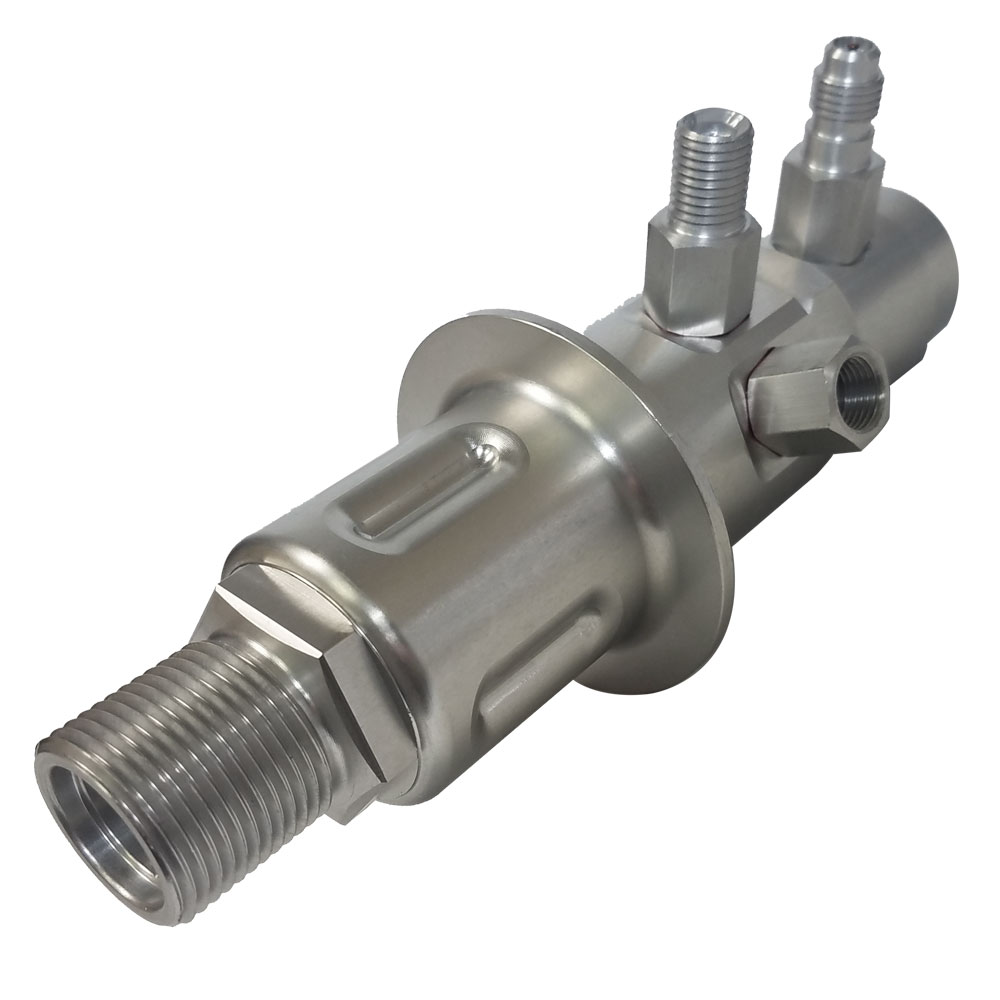
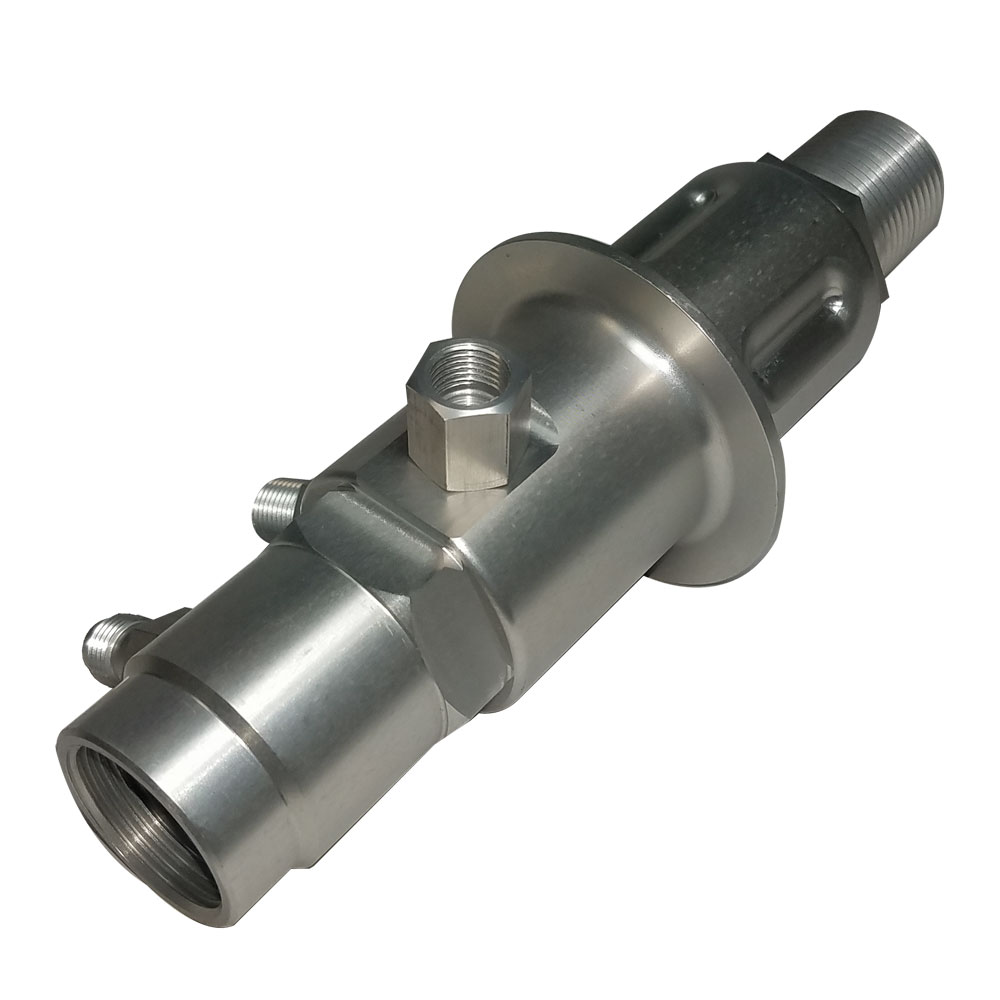
POA Eliminators
.jpg)
.jpg)
We are proud to offer our exclusive Billet POA eliminator option. These have the same function as a value price POA, but with the aesthetic and fit of the original valve. they do also require a pressure switch to now cycle the clutch of the compressor converting from a bi-pass system to a cycling system.
1973-76 Models with VIR
The VIR is installed on the evaporator, near the firewall. Here is an example:
.JPG)
(Click here for more information about VIR Restoration)
Minimum Requirements
- Due to the VIR's incompatibility with 134a, we highly recommend replacing it with our VIR Eliminator Kit
- Change desiccant in VIR.
- Drain the compressor oil and recharge with 134a compatible (PAG or Ester Oil) oil. This is assuming the compressor is currently functioning correctly.
- Ensure that the system is clean and free of contaminants (Depending on component condition, this may be a simple matter of blowing out with compressed air or liquid flushing with an air-conditioning flushing agent)
- Replace or restore all rubber hoses with barrier hose.
- Install 134a charge port adapters.
- Charge with 134a between 70-80% of the original R12 charge amount.
- Replace any O-rings with 134a compatible.
Recommended:
- Install hi/lo pressure switch
- Rebuild your original VIR or purchase a rebuilt one from us
HELPFUL HINTS
- Ignore the sight-glass. A properly charged 134a system will likely show bubbles in the sight-glass.
- Typical 134a charge rate will be approximately 70-80% of the factory R12 charge amount.
VIR Options from Original Air
VIR Eliminator
There are limited options with vehicles originally equipped with VIRs. The most popular is to upgrade to VIR eliminator. This like the POA eliminator, turns a bi-pass system into a cycling system.
.jpg)
.jpg)
1977-Newer Models with Accumulator
The accumulator is most often installed on the evaporator, near the firewall. It is the earliest of the modern cycling sytems GM used. These systems had a pressure switch and orifice tube. Here are some examples:
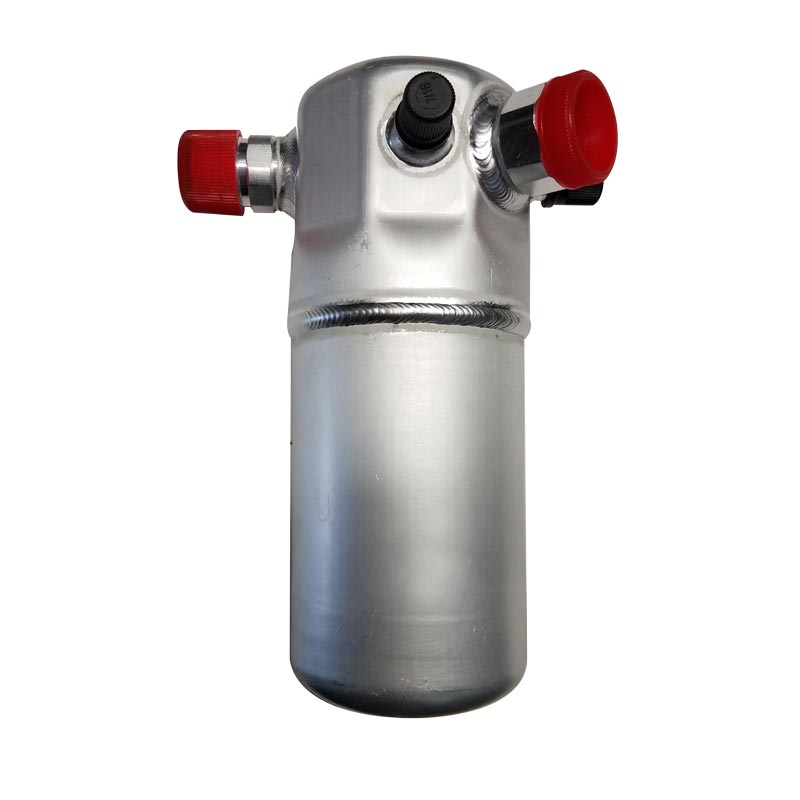
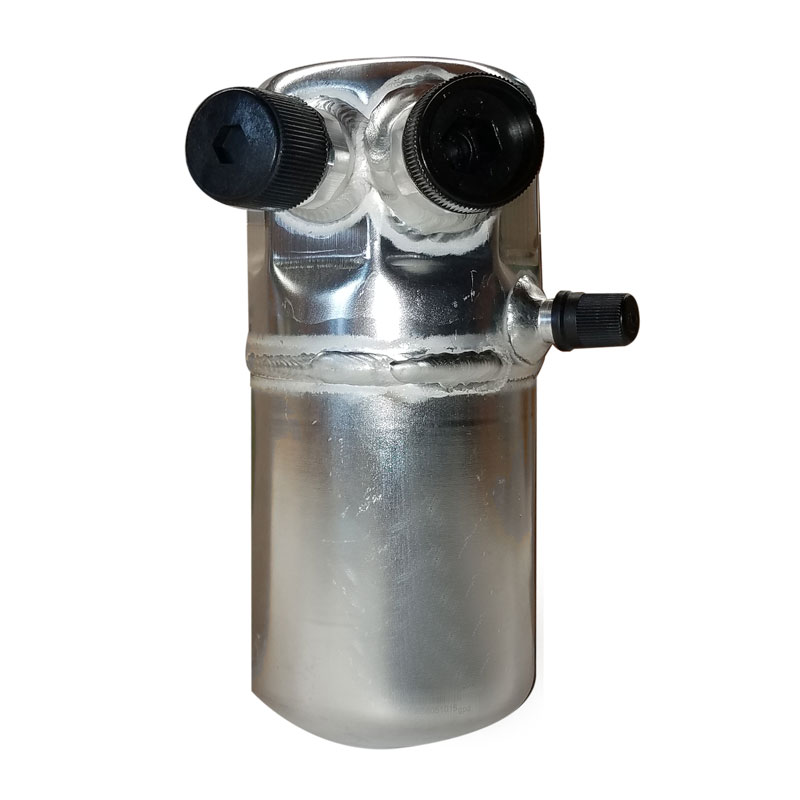
If you happen to have unique accumulator or drier that is difficult to find we can rebuild your original!
(Click here for more information about Accumulator Restoration)
Minimum Requirements
- Change or restore the accumulator.
- Ensure that the system is clean and free of contaminants (Depending on component condition, this may be a simple matter of blowing out with compressed air or liquid flushing with an air-conditioning flushing agent)
- Drain the compressor oil and recharge with 134a compatible (PAG or Ester Oil) oil. This is assuming the compressor is currently functioning correctly.
- Replace or restore all rubber hoses with barrier hose.
- Install 134a charge port adapters.
- Charge with 134a between 70-80% of the original R12 charge amount.
- Replace any O-rings with 134a compatible.
Recommended:
- Install hi/lo pressure switch
- Upgrade the standard orifice-tube to a variable orifice tube.
HELPFUL HINTS
- Ignore the sight-glass. A properly charged 134a system will likely show bubbles in the sight-glass.
- Typical 134a charge rate will be approximately 70-80% of the factory R12 charge amount.